Growing Andean root crops: Oca
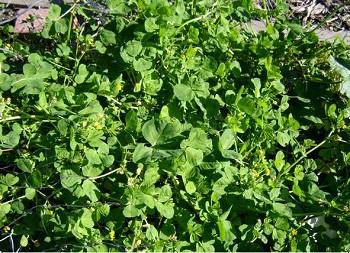
This member of the oxalis family produces underground rhizomes just as our native oxalis species do, but in the case of O. tuberosa, the rhizomes are large and edible. Though not well-known in North America, oca has been grown and eaten for centuries as a staple in the Andean regions of Peru and Bolivia. It is potato-like in flavor. We wanted to see if we oca could be grown in our area, and so we began our trial in the spring of 2008.
Here is a step-by-step description of how we grew Oca.
On April 22 we planted 13 tubers about 3” deep in a well-composted bed at the Elkus Demo Garden south of Half Moon Bay. The beds had drip irrigation and we kept the soil moist. The seed tubers took a very long time to produce shoots above ground.
By June 10 (7 weeks later) only 3 plants out of the 13 had broken the surface of the soil, and when we dug down, we couldn’t find any of the others we had planted. We never knew if the tubers had rotted or had been eaten by something, but we ordered more seed tubers.
On June 14 we planted the new tubers in potting soil in small pots to sprout, rather that directly in the ground. We kept them moist and in a sunny spot. These also took a long time to sprout, but were more successful.
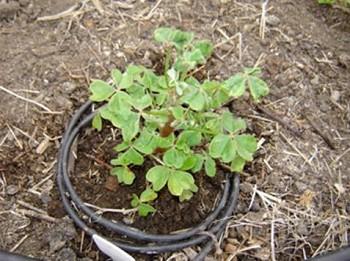
The oca continued to grow throughout the summer. We experienced no plant diseases or insect problems. We did have a terrible time with both deer and bunnies continuing to thwart our efforts to keep them out of the bed. They seemed to love the taste of our oca plants.
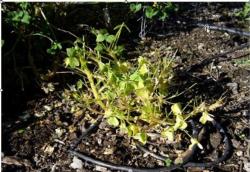
By December 5, only five of our oca plants had survived the onslaught of the nibblers. Those that did survive had grown rather wide with lots of green foliage. They produced tiny daisy-like yellow blossoms on their tips. None of the plants showed any sign of disease or insect damage.
Harvesting the oca
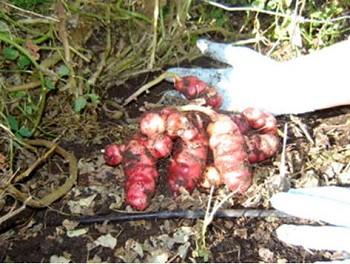
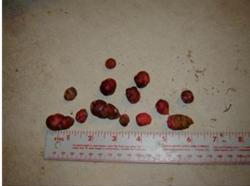
The oca tubers were fat, oblong and shiny, and almost waxy. They were mottled red and white in color. They were wrinkled and slightly bumpy. They ranged in size from as small as a marble to as long as 5". From the five surviving plants, we harvested four pounds of oca tubers.
We left them in a sunny window for 3 or 4 days before cooking them. This is a practice called “hardening” which allows the tubers to sweeten a bit and to lose some of the oxalic acid that makes them tangy. The oca can then be stored like a potato in a cool place for consumption later in the winter.
We, however, ate most of the oca right away. See below for a description of how we prepared them.
We kept the very small tubers from our harvest to replant in spring 2009, storing them over the winter in two different ways.
In spring of 2009 we conducted a follow-up trial.
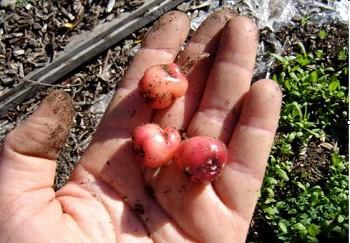
- We buried some of the tubers in damp sand, and kept them in a sealed container in cool spot.
- We buried others in dry sand, and kept them in a sealed container in cool spot.
When it came time to sprout the tubers in spring 2009, we found that those in damp sand had not survived their storage. They were soft and fermenting. Luckily all of the tubers in the dry sand were in good shape, and many were already sprouting in their bed of sand.
Here's how we conducted our second trial of oca.
April 29: The tubers were planted in 4” pots in a 50/50 mix of commercial potting soil and finished compost. They were kept indoors in a warm sunroom and the soil was kept damp.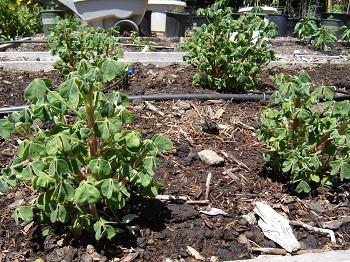
Most of the plants thrived throughout the summer. We lost a couple to unknown causes, possibly a gopher, but they took no care other than water and weeding. As we found last year, the Oca didn’t suffer from any pests or diseases.
We expected as autumn approached for the oca to put out their tiny yellow daisy-like flowers. Last year our crop flowered quite a bit before harvest. This year, not one flower appeared, and we don’t know why. Oca has a long growing season and the tubers don’t really get large until fall. Fearful of a possible frost, we went ahead and harvested on December 15 even though the plants had not yet withered.
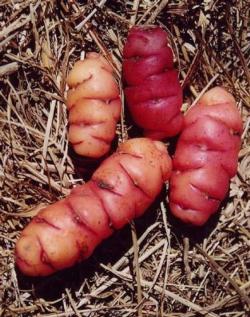
We again saved the smallest tubers from the harvest to plant again in the spring.
Oca is so delicious that we would like to encourage home gardeners to try this unusual crop. It has been a favorite and a staple for so long in South America, and more recently in New Zealand, where oca has become quite popular and commonplace. The greatest difficulty we encountered was finding where to buy the seed-tubers for planting; we suggest www.nicholsgardennursery.com as a possible source.
Cooking Oca
Scrub the tubers under water to remove the soil. Peeling is not necessary. We like to toss the tubers in olive oil and salt and pepper and roast them in the oven like potatoes.
They are delicious. The cooked texture is softer than a potato, more like a cooked winter squash. The flavor was very much like a potato with sour cream already on it....a residual tang from the oxalic acid content.
